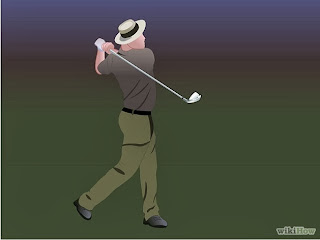
For those who are looking to put their tee-shot in play, what follows are methods to improve the distance of your drive, learned through many rounds of golf and many hours on the rang.

Have proper equipment. Today's equipment and balls are not necessarily tailored for 7 - 8 degree drivers. That is a thing of the past. Getting the ball up in the air on a good trajectory is the first step to driving the ball longer. Many touring pros regularly use 9 and 10 degree drivers and drive the ball 300 plus yards. Today's average driver loft for amateurs is 11.5 degrees. Plus, you will get much more consistency with a more lofted driver.
Step 2:

Start with your front foot in line with the ball to give it more loft during the set up. When you go for your backswing, you should shift your weight backward. This will give your swing more power.
Step 3:

Use the proper grip pressure. Even though you may think that gripping harder and swinging harder produces results, that is absolutely incorrect and is probably why you don't get consistent distance. Cal Ripken, a hall of fame baseball player for the Baltimore Orioles, recently indicated to the Golf Channel that his grip pressure on the bat (on a scale from 1 being easiest to 10 being hardest) ranged from 2-4 for perfect release. The great Harry Varden,is given credit in the movies for this teaching, but actually instructing legend, Phil Galvano first introduced the idea that you will find that the great players indicated that the grip pressure should resemble one holding a bird without crushing it but also not letting it go. The tighter you hold the club, the less it will release throughout the ball. Hands must be tension free. Try it at the range and watch for the results.
Step 4:

Step 5:

Stay flat. Your driving wood should stay along the ground for at least the first 20 to 25 percent of your swing. If your club is lifting up, you will pop the ball up and not get that long, boring drive that you see the pros hit regularly (when the ball takes off like a missile and slowly climbs to a beautiful height and tracks down the fairway).
Step 6:

Keep the angle on your leading hand. Many amateurs tend to flip the hands forward in an effort to get the ball in the air, which defeats the purpose of having good equipment (as noted earlier). The leading hand (left hand for most players, right hand for southpaws) should be angled down towards the ball on the downswing. It's like you are hitting the ball with the back of left hand. If your left hand is flipping up on the downswing, your contact will not be solid and you will get consistent misses with your wood. Keeping the angle starts the ball low and lets it climb on its own through your generated power.
Step 7:

Step 8:

Finish the golf swing over your left shoulder (for right-handed golfers) or right shoulder (for left-handed golfers). Don't be in a rush to look up and see where the ball went. If you did this correctly, the ball went straight.

Pick a spot on the ground that lines up with your target and, from your address, stretch your wood towards it. If done correctly, your arms should form a "V" shape with both arms fully extended. If you have a tendency to bend your left arm early, that will retard distance; keep your "V" as long as possible before it bends at the finish of your swing and you will find yourself getting much more distance.
Step 8:

Finish the golf swing over your left shoulder (for right-handed golfers) or right shoulder (for left-handed golfers). Don't be in a rush to look up and see where the ball went. If you did this correctly, the ball went straight.


0 comments:
Post a Comment